Creating an LED indicator for email using a Raspberry Pi
Requirements:
- Raspberry Pi with Raspberry Pi OS installed (Any model will work)
- Jumper wires
- 1 LED
- 220 Ohm resistor
Enable less secure app access
In this tutorial you will be learning how to create an email notifier using an LED, Python and the Raspberry Pi. This tutorial is specifically tailored to Gmail but will work with other email providers with some tweaking.
The first thing you will need to do is enable Less secure app access on your Gmail account. This will allow Python to connect to your account.To do this, click your name on the top right and then click ‘Manage your Google account’. You should see the screen below:
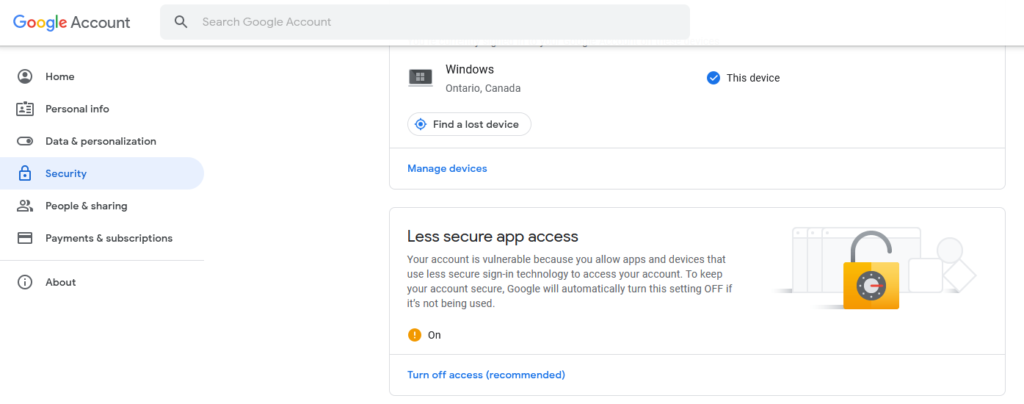
Click on the ‘Security’ tab on the left and navigate to the ‘Less secure app access’ section. Here you will want to click ‘Turn on access (not recommended)’ and ‘Allow less secure apps’ should be ON. With this out of the way let’s wire up the LED to the Raspberry Pi.
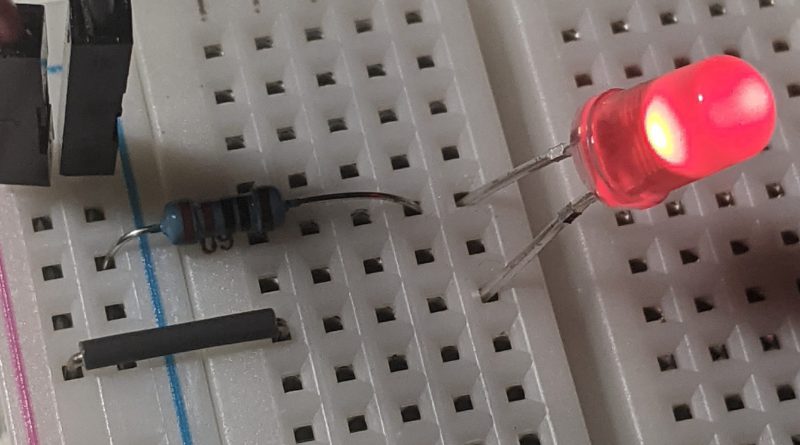
Wiring the LED
Wiring the LED is pretty straightforward. I will be using a breadboard to wire up the LED. Connect 2 wires to the GPIO. One on GND (3rd pin on the right) and one to GPIO26 (2nd last pin on the left).
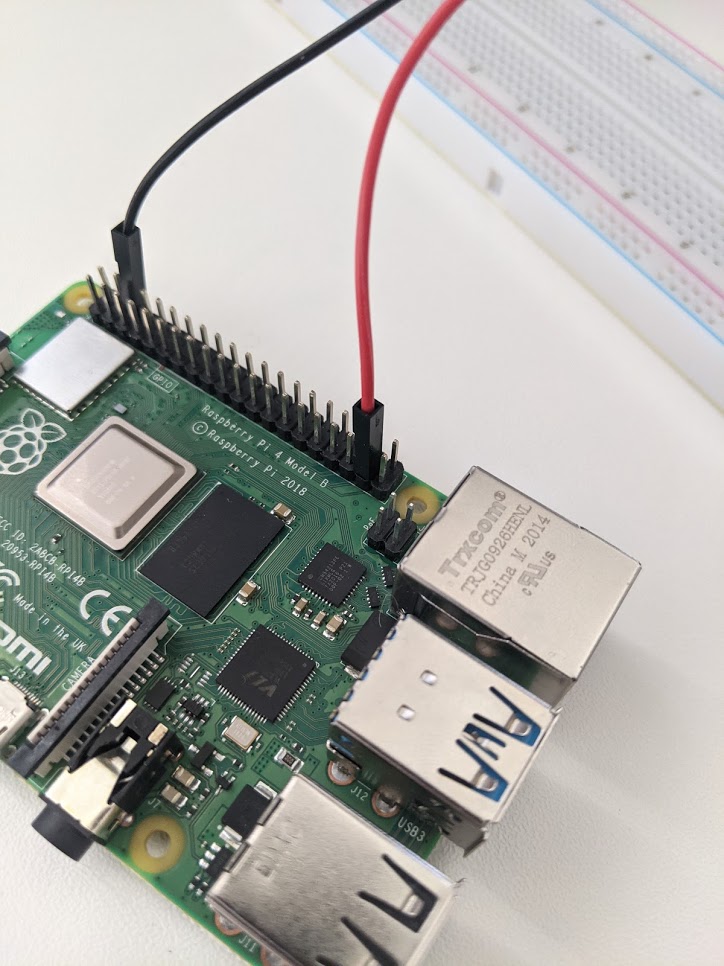
Connect the GND wire to the negative rail and connect the GPIO26 wire to the positive rail on the breadboard.
Connect the long leg of the LED to the GPIO26 wire and connect the other leg to the GND wire using a 220ohm resistor. See picture below for reference:

Writing the Python code
Run the following command to install IMAPClient:
pip install IMAPClientImport RPi.GPIO to control the GPIO; time to periodically check your inbox and IMAPClient to access your mail server:
import RPi.GPIO as GPIO
import time
from imapclient import IMAPClient
Define a variabled named HOSTNAME and assign it to 'imap.gmail.com':
HOSTNAME = 'imap.gmail.com'Next, create variables to store your email address and password. Note: It is highly recommended not to store credentials in code. This is for educational purposes only:
EMAIL = 'myemailaddress@gmail.com'
PASSWORD = 'mypassword'
After this, define the GPIO mode as GPIO.BCM and setup the GPIO26 pin to be an output with an initial value of GPIO.LOW:
GPIO.setmode(GPIO.BCM)
GPIO.setup(26, GPIO.OUT, initial=GPIO.LOW)
That’s it for setting everything up. Let’s take a look at how to access the mail server, read the total of unread emails and add logic to turn the LED off or on.
Since we want this to continuously monitor our email, start by creating an infinite while loop. Access the mail server by defining a new IMAPClient taking the HOSTNAME and setting the following options to true; use_uid=True, ssl=True and finally, log in to the mail server using your email and password:
while(True):
     server = IMAPClient(HOSTNAME, use_uid=True, ssl=True)
     server.login(EMAIL, PASSWORD)
Once we are logged in, you will want to call folder_status on Inbox and get the UNSEEN value. This will give you the count of unseen messages:
    unseen = server.folder_status('Inbox', ['UNSEEN'])
    count = (unseen[b'UNSEEN'])
    print('%d unseen messages' % count)
All that is left to do now, is simply turn on the LED if our count is greater than 0 (meaning we have unread messages), otherwise turn the LED off. Finally, add a sleep of 10 seconds (we do not want to spam the server):
    if count > 0:
        GPIO.output(26, GPIO.HIGH)
    else:
        GPIO.output(26, GPIO.LOW)
    time.sleep(10)
Full code:
import RPi.GPIO as GPIO
import time
from imapclient import IMAPClient

HOSTNAME = 'imap.gmail.com'

EMAIL = 'myemailaddress@gmail.com'
PASSWORD = 'mypassword'

GPIO.setmode(GPIO.BCM)
GPIO.setup(26, GPIO.OUT, initial=GPIO.LOW)

while(True):
    server = IMAPClient(HOSTNAME, use_uid=True, ssl=True)
    server.login(EMAIL, PASSWORD)
    unseen = server.folder_status('Inbox', ['UNSEEN'])
    count = (unseen[b'UNSEEN'])
    print('%d unseen messages' % count)
    if count > 0:
        GPIO.output(26, GPIO.HIGH)
    else:
        GPIO.output(26, GPIO.LOW)
    time.sleep(10)
And that’s it! Now you know how to create an email notifier using an LED, Python and the Raspberry Pi. Running this python script will light up the LED when you have unread mail!
Need more inspiration? Check out these awesome projects!