How to overclock the Raspberry Pi
In this tutorial, we will be looking at how to overclock the Raspberry Pi.
Requirements
When you overclock your Raspberry Pi, it is recommended that you use a proper power supply (A charger is not a power supply!). Failure to do so can cause unexpected results. I recommend the Raspberry Pi 4 Model B Official PSU @ Amazon for the Raspberry Pi 4 and the Official Raspberry Pi 3B @ Amazon for any other Raspberry Pi.
Why overclock?
Before we get into how to overclock, lets take a look at why we overclock. Overclocking is the act of increasing the clock speed of the CPU. The benefit of overclocking a CPU is that you get a faster CPU with a faster clock speed, enabling it to do more operations per second. With that said, overclocking will leave your CPU running at a higher temperature and ultimately it will have a shorter lifespan.
Checking the current speed
To check the current speed of the CPU you can run the following command:
watch -n 1 vcgencmd measure_clock armRunning this command will allow you to view your clock speed updating every second. If you are not doing anything intensive, the clock speed is most likely sitting around 600000000. Although the Raspberry Pi is rated at 1.5GHz, it will typically idle at 0.6GHz and boost to 1.5GHz when needed.
Updating the system
Before you overclock the Raspberry Pi, it is always a good idea to check for updates to get the latest software. This can be done using the following command:
sudo apt update
sudo apt dist-upgrade
After this step has been complete, go ahead and reboot your Raspberry Pi:
sudo rebootModifying config.txt
To overclock the Raspberry Pi you will need to modify /boot/config.txt:
sudo vi /boot/config.txtFind the following text in the /boot/config.txt file:
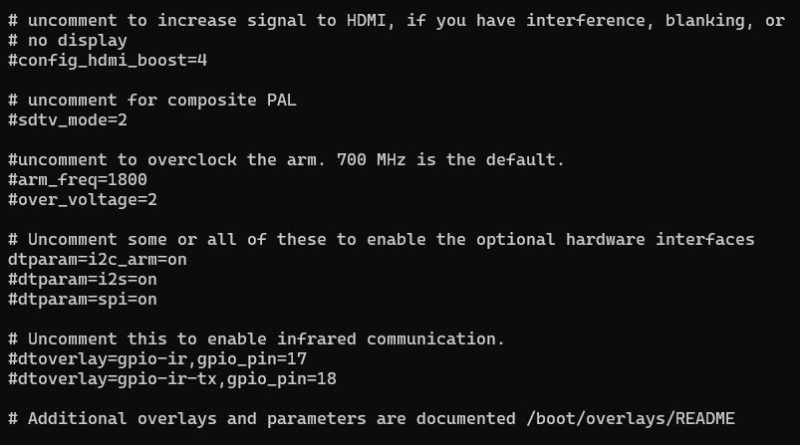
#uncomment to overclock the arm. 700 MHz is the default.
#arm_freq=800
To overclock the Raspberry Pi, you will need to uncomment arm_freq=800 and set 800 to a new value. I recommend started with 1800. This will set the upper limit of the CPU to 1.8GHz:
#uncomment to overclock the arm. 700 MHz is the default.
arm_freq=1800
After arm_freq=1800 you should add a new parameter over_voltage and set it to 2. This tells the Raspberry Pi to give more power to the CPU. The range of accepted values for over_voltage is between -16 and 8:
#uncomment to overclock the arm. 700 MHz is the default.
arm_freq=1800
over_voltage=2
Finally, reboot the Raspberry Pi:
sudo rebootAfter rebooting, you can monitor your CPU speed by running the following command again:
watch -n 1 vcgencmd measure_clock armAgain, you may see a value of around 600000000. When you start using your Raspberry Pi more intensely this value will jump to 1800000000.
A word of caution
I would not recommend overclocking your Raspberry Pi over 2.0GHz and setting over_voltage higher than 6 (doing this will set the warranty bit on your Raspberry Pi) When overclocking, be sure to use a proper power supply that can provide adequate power to the board. Again, a Charger is not a power supply!
Interested in starting a new Raspberry Project? Checkout these projects!